How to set up a VPN connection on your Asus VPN Router
Table of Contents
Why should I use a VPN router?
There are a number of reasons why your might want to connect to a VPN server using a hardware router: The router allows you to connect devices to the VPN which otherwise have no VPN functionality at all (Smart TVs, gaming consoles, Google Chromecast, Apple TV, Amazon Fire etc.). A VPN router even lets you connect all your home devices to the VPN at once.
Even for advanced users, setting up a VPN router can be a challenge. That’s why we have developed the Shellfire Box. This tiny, pre-configured VPN router makes your connection to Shellfire VPN a plug & play experience. It comes with a easy-to-use user interface. With the Shellfire Box, switching to a VPN server in another location is a matter of a few clicks.

There also are a few downsides to using the Shellfire Box. For demanding users, it might simply be too slow. With its download speeds capped at 15 Mbit/sec (due to CPU power), it is good enough forvideo streaming in 1080p HD quality and most regular internet activities, but the pro user might feel slowed down or restricted.
Also, the Shellfire Box can only be used with Shellfire VPN.
By using a more expensive hardware router with stronger CPU power, users can enjoy higher download speeds and may feel less restricted than with the Shellfire Box. Many routers will also offer additional perks like 5 GHz Wi-fi and external antennas for better coverage.
While most home routers do not offer the possibility to act as a VPN client by default, many can be upgraded with this functionality. This is usually done by flashing the router with a 3rd party firmware. Firmware is available from open source projects like OpenWRT, dd-wrt or Tomato. However, we do not recommend flashing your router’s firmware unless you know 100% what you are doing: Flashing the firmware might void your warranty and could leave your router in a permanent “bricked” state if done wrong.
We found out that among the many high performance VPN routers available, those from Asus come with great VPN support out of the box. They may need some additional tweaking to setup compared to the Shellfire Box, but if you’re into the game of high-speed encrypted internet access, they’re our recommended manufacturer to buy from. For this reason, this guide will focus on setting up a VPN connection using Asus routers which are able to act as an OpenVPN client using the pre-installed firmware (no flashing required!).
Which Asus router should I buy for VPN?
Asus has a wide range of routers with VPN capability available. The choice of a model depends on your budget and on your personal requirements. If you are on a tight budget, the Asus RT-AC58U might be the right choice for you: It comes equipped with a Quad Core CPU running at 710 MHz, 4 Wi-fi antennas and operates at both 2.4 and 5 GHz.
If you need even more power and are ready to spend a bit more, check out the Asus RT-AC68U or even the Asus RT-AC88U. The CPUs of these routers are clocking at 800 MHz and a whopping 1.4 GHz respectively. Since VPN encryption is rather CPU intensive, a higher CPU clock speed will usually result in faster download rates over the VPN.
Adding more CPU cores does not really help in achieving better download speeds. Any router with a CPU clocking between 500 and 800 MHz should be fast enough for streaming 1080p HD video. If you are looking for a router with enough power to stream videos in 4k resolution over a VPN connection, you’ll need at least 1 GHz.
Disclaimer: We earn a small commission for any product you buy by clicking the Amazon affiliate links above. The purchase prices remain unchanged by this.
What else do I need for my VPN connection?
You need a Shellfire VPN Premium or Premium Plus account in order to download the required config file. If you bought a Shellfire Box, you already own a Premium Plus account. Visit https://shellfire.net/ and log in to your user account. Open the quick access bar at the top of your screen and select your VPN account.
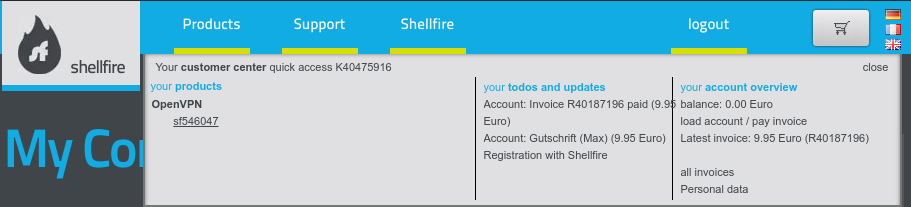
Select your VPN account in the Shellfire VPN customer center
Now, scroll down and download the config file for iPhone / iPad (don’t worry, it will also work on your Asus router).
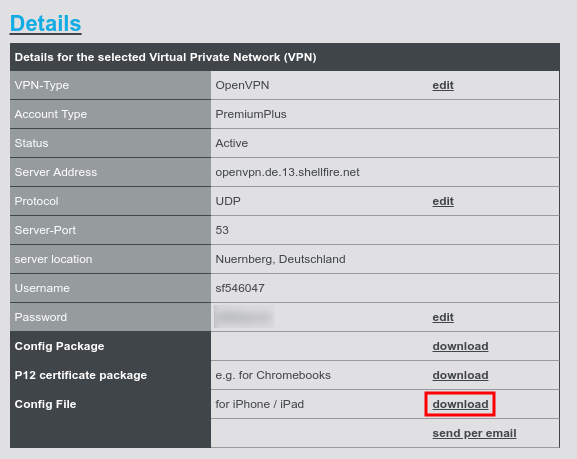
Download the config file from the Shellfire VPN customer center
That’s it, you now have all you need to start setting up your router. Please note that you have to download the config file and go through the installation process again every time you switch to a different VPN server.
Setting up your Asus router to connect to the VPN
- Now let’s suppose that you have just unboxed your brand new Asus VPN router. The first thing you need to do, is of course connect it to a power outlet and to your internet connection through its blue Ethernet port. Once the blue LEDs have stopped flashing, you should be ready to connect to your new router. You either connect through Wi-fi or using an Ethernet cable. Once connected, your browser should automatically redirect you to http://router.asus.com/ where you will be presented with a setup wizard. First things first, let’s set up a secure password to protect admin access to your router and hit “Next”.
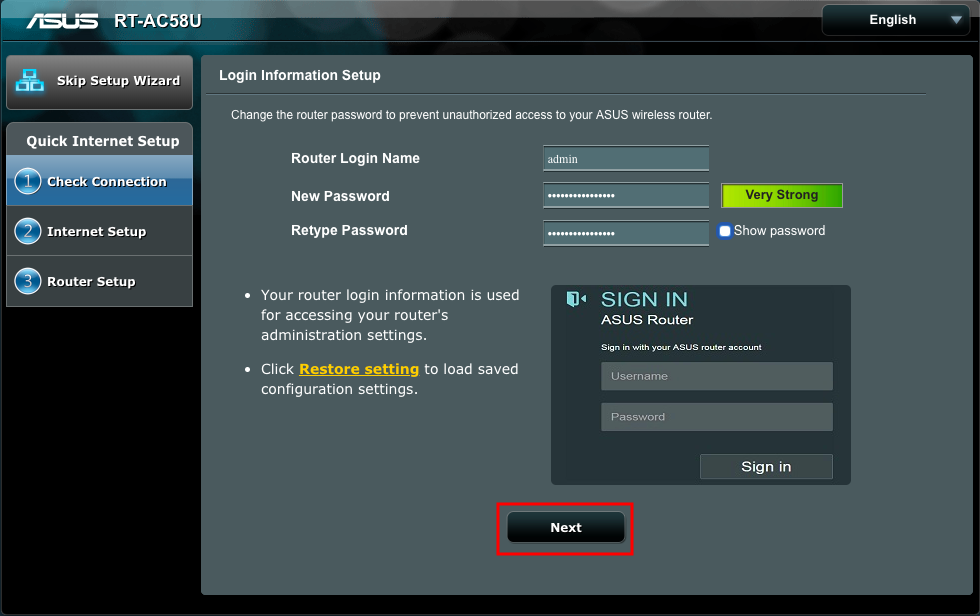
Select a secure admin password for your Asus VPN router
- Now, set up a secure password and name(s) for your wifi network(s), hit “Apply”.

Select secure Wi-fi passwords
- You should now already have a working internet connection through your new router. It is a good idea to verify that by visiting our VPN status page.
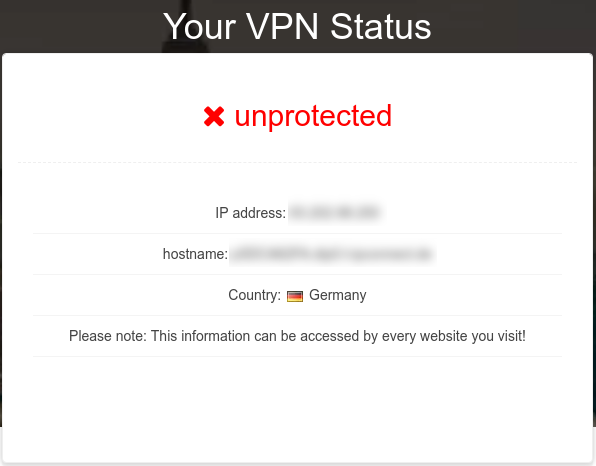
The Shellfire VPN status page shows your protection status
- Log in to your router with your admin credentials at http://router.asus.com/ or http://192.168.1.1/ . Use the admin credentials you set in step 1.
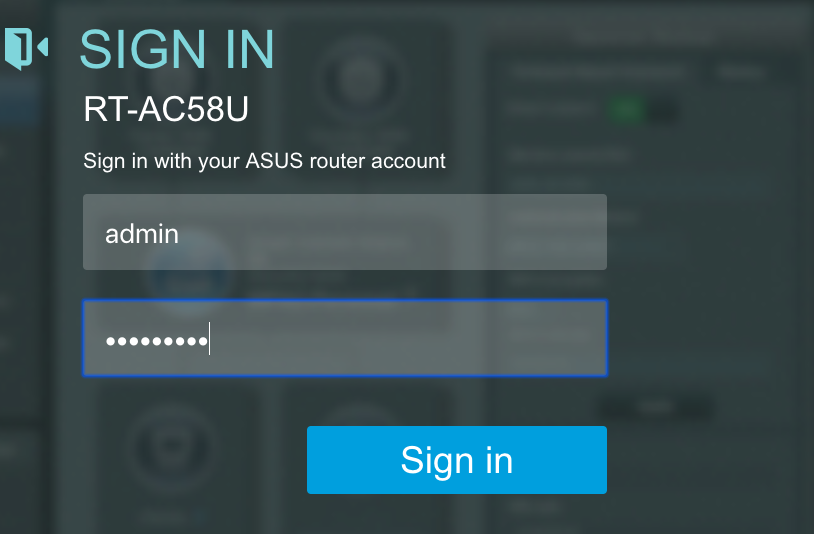
Log in using your admin credentials
- In the router menu, select “VPN” under “Advanced Settings”.
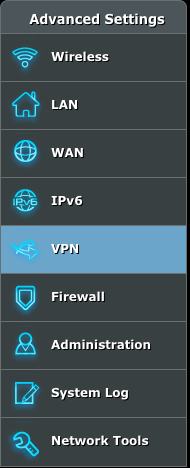
Select “VPN” under “Advanced Settings”
- Switch to the tab “VPN Client” and hit the “Add profile” button.
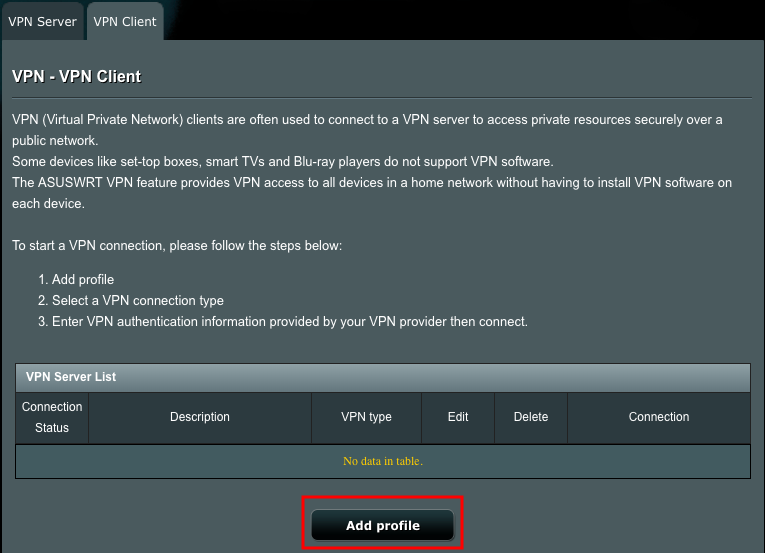
Start adding a VPN profile
- Switch to the tab “OpenVPN” and enter any description for your new profile. Then, hit choose file and navigate to the config file you downloaded earlier. Click “Upload”. Once that is done, hit “OK”. Note that no username or password is required.
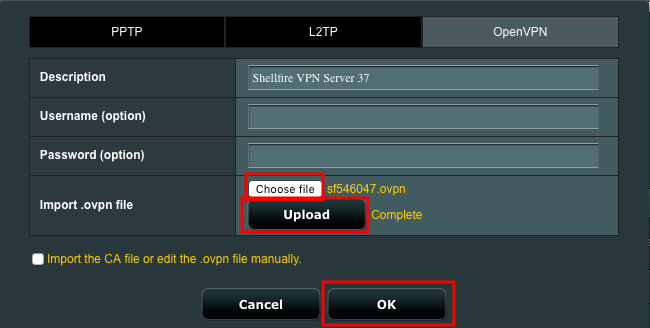
Upload your OpenVPN config file here
- You will now be presented with a list containing your new profile. Hit “Activate”.

Activate your VPN profile to connect
- Once your VPN connection has been successfully established, you will see a check mark appear under “Connection Status”.

Once you see the check mark, your VPN connection is up & running!
- All devices connected to your Asus router are now protected through Shellfire VPN. To verify this, visit the VPN status page once again. It should now display a protected status.
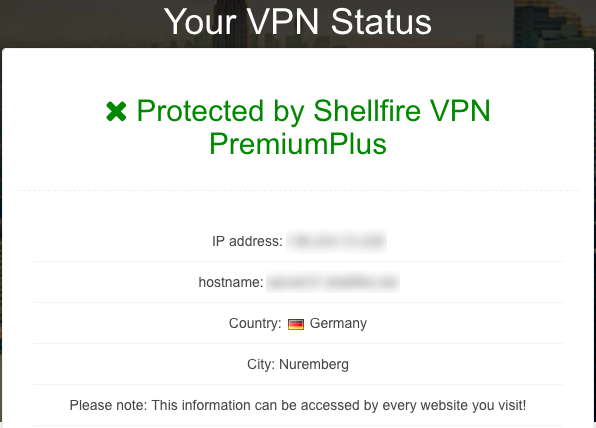
Make sure to verify your protection status
- You can go back to your normal internet connection any time either by switching to your regular Wi-fi network or by hitting “Deactivate” in the Asus router menu.
And that’s it, all your home devices are now easily protected by your brand new Asus VPN router! You can repeat the steps above to create multiple connection profiles for different VPN servers. Please note that you will have to switch to the selected server through the Shellfire VPN customer center at shellfire.net/ each time you want to switch servers on your router.
Interested in getting one of these beastly Asus VPN routers for yourself? Click here:
Disclaimer: We earn a small commission for any product you buy by clicking the Amazon affiliate links above. The purchase prices remain unchanged by this.